Friday 29 November 2013

Dessert - Pineapple Cake

Hello my fellow Artists !

How are those adventures ? I haven´t seen many comments or recipe suggestions ! Participate! =)

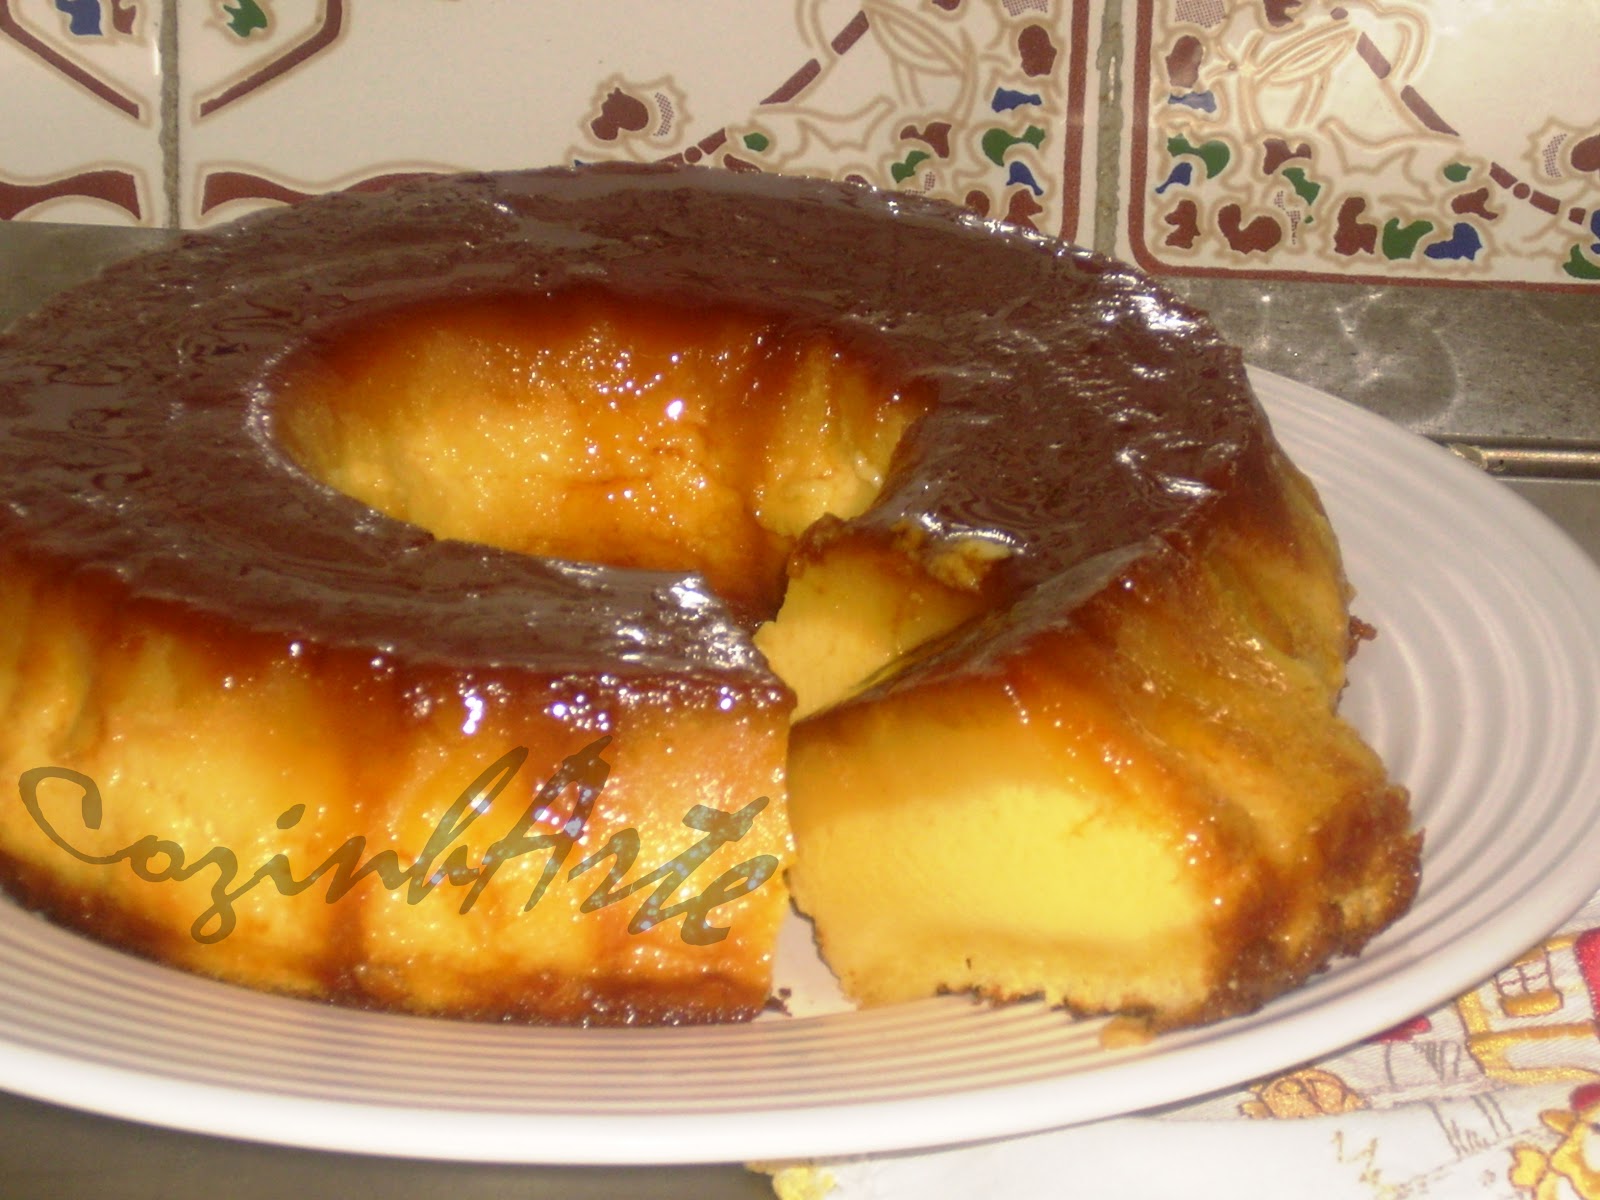
Today I bring a very good recipe that was cooked in Croatian territory! (we have to travel a bit, but desserts can not miss!)
It is a quick , cheap and completely easy to make, in addition to that, it is different and delicious! You will need:


  • 250g flour ;
  • 250g of sugar;
  • 6 eggs ;
  • 1 can of sliced ​​pineapple
  • 100g sugar + water q.s. (for the caramel )


- We start by beating the eggs with the sugar until we have a homogeneous cream ;
- Add the sifted flour gradually , beating constantly. Between the flour , add the pineapple syrup  to the dough so it doesn't get too hard .
- Put sugar in a frying pan with a small amount of water (enough to moisten all the sugar but not to cover it) . Let it boil and stir all the time. When getting a brownish tone , remove from the heat and add a little of hot water. ATTENTION! The caramel is very hot! Adding the water add just a little bit because otherwise you will get splashed all over the side and is not good!
- Return the frying pan to medium heat for a few seconds just to reheat the caramel and pour quickly into the cake shape.
- Caramelize the whole way quickly before the caramel get hard.
- Arrange a few slices of pineapple on the cake shape (I like to put some on the sides too) and if you want, halves of candied cherries in the middle of the slices (in my opinion cherries is merely aesthetic , does not add any new flavor to the cake , but it is very cute).
- Pour the dough into the shape and bake in a hot oven .
- Watch it so it doesn't burn and when it's cooked, remove from heat and unmold when the caramel still hot or it will stick to shape .

Pretty easy isn't? you can still buy the caramel, but I like to do at home. has another taste =)


And that's it. Comment, suggest and have....
Good Adventures !

Tuesday 5 November 2013

Carrot Roll-Pie


Hello Artists !

Today I reveal one of my most coveted recipes.
It is delicious , easy to make and in the end you always cry for more!
We just need:


  • 500g Sugar
  • 500g carrots
  • 6 eggs
  • 120g flour
  • zest from an orange

- We start by boiling the carrots in water only (the smaller you cut the carrots the faster it bakes);
- After baking , pour the water out (badly, leave a little of water in it) and reduced everything to puree ;
- In a bowl mix together the sugar and the eggs, stirring well until you get a homogeneous cream;
- Add the carrots to the cream and keep stirring ;
- Add the flour, stirring constantly to avoid forming lumps ;
- Scrape the orange into the dough and add some juice if you like intense flavor of orange (but not too much or the dough does not bake properly);
- Grease a pan with butter , line with parchment paper and re-greasing it with margarine ;
- Pour the dough in the pan and bake it at 180º (is very little time , be aware!)
- When it is cooked (do not let it dry too much , this pie is like a " cheesecake ") sprinkle with sugar (a good portion of it) and unmold the cake over a plain cloth;
- With the aid of the cloth , wrap the pie into a roll, pressing it well to get the form of roll-pie;
- Garnish with orange slices .

This one was bake in a wood oven. A true wonder! Bake very slowly which increases that texture that this "cheesecake" pie deserves! Very cheesy!


Hope you like it!
Don´t forget to give suggestions and comment!
Have nice adventures! 

Monday 4 November 2013

Dessert - Cheesecake

Hello fellow artists!

I now bring a delicious recipe and I think I will love it !
This recipe takes some time to do , but believe me it worth the waiting!

We will need :

  • 200 g Biscuit type "Maria" ;
  • 100 g butter;
  • 1/2 cup port wine .

- Crush the biscuits with the aid of a ladle (which become thicker than in the chopper and gives a crispier basis);
- Add the butter and port wine and mix well ;
- Spread it on the bottom of a form with removable bottom .

Then we need :

  • 7 gelatin leaves, colorless;
  • 350g of fresh cheese cream;
  • 200 g of sugar;
  • 210 ml milk ;
  • 1 package of cream;
  • Lemon peel
  • 2 eggs .

- Start by soaking the gelatin leaves in cold water and boil the milk with the lemon peel ;
- Beat the egg yolks with the sugar and add the milk hot slowly in a wire ( to dissolve the egg yolk and sugar );
- Take the egg yolks and milk on the stove to boil , stirring constantly . Then remove from the heat and add the drained gelatin leaves until they dissolve . Place in the freezer for a while to cool completely ;
- Meanwhile whip the cream with a tablespoon of sugar, and the egg whites also. Mix both adding the cream to the egg whites (not the other way around!) and set aside in the refrigerator ;
- Remove the mixture from the freezer and add the cheese, mixing well ( normally I use a magic wand in this part);
- Add the cream with the egg whites, stir everything well and pour over the biscuit base. Take it to chill until it gets firm (also usually put it in the freezer ) ;

Finally we need :

  • 3 tablespoons of fresh fruit jam (you can choose what you like best . Generally use red berries, this time it was only raspberry );
  • 2 sheets of gelatin;
  • 2-3 tablespoons of water.

- In a small saucepan , pour the jam with the water and let mix it until it gets slightly warm (only warm enaugh to dissolve the gelatin leaves);
- Soak the gelatin in cold water ( 1 to 2 minutes it's enough);
- Add the gelatin to the jam to dissolve;
- Wait until it is almost cold (otherwise the cover and the filling may get mixed) and spread the jam over the cream;
- Put it in the fridge (or in the freezer if you don't have much time) , preferably for a good time (between 7-8 hours) and then unmold it and garnish has you wish .


If you used the freezer as I, after unmolding leave in the fridge before serving so it doesn't look like a ice cream. And it can melt because of the ice turning into water! So be careful using the freezer!


Hope you like it!
Have good adventures!


Dessert - Puding-cake


Hello fellow artists!

Today I bring a cake that would blow my mind before I do it myself. It wouldn't fit in my head how you could join a cake and a pudding without cooking it separately , but it's possible, and gets pretty good!


This recipe has a sweet taste as orange! You will need:


  • 1 can of condensed milk;
  • 1 can ( the one of the condensed milk ) of orange juice;
  • 3 eggs;
  • 2 eggs;
  • 1 cup sugar;
  • 1/2 cup of orange juice;
  • 1 cup flour;
  • Orange zest qs;
  • Yeast qs.
If you want to make your own caramel , put boiling :
  • 1/2 cup of sugar;
  • 1/4 cup of water

when you ave a strong caramel add another 1/ 4 cup water , stir and return to boil well .

- Begin by mixing with a blender a can of condensed milk , a can of orange juice and 3 eggs ;
- Pour into a round shape with a hole already with caramel ;
- In a bowl beat 2 eggs with sugar , slowly add the orange juice and sift the flour , stirring well . Add orange zest to as you like and pour carefully over the pudding already in the shape, with circular movements without overloading a single point .
- Bake in a water bath at 200 ° C , with the top covered with aluminum foil , for about 1 hour;
- After 1 hour, check with the aid of a toothpick if it is cooked ;
- Let it cool a bit and when warm (almost cold) unmold ( if too early, the pudding can fall apart because of the heat , if it is too late ,  the caramel will crystallize! ) ;

If you want , replace the orange with lemon, but put half the quantity of juice not to get a flavor so intense . You can replace the rest of the quantities with milk .


Have nice adventures!!

Birthday Cake

Hello Artists !

Not sure which category to put this topic , so I chose a new one: Art .
A birthday cake, more than a dessert or a sweet, is always a piece of art . If it is for someone in particular , we can always put our special touch.

Making a birthday cake can take some work, but isn't impossible.

- We begin by making two times the recipe of the Bread Sponge Pie and of the Egg Jam . Lay half the dough of the bread sponge cake in a small rectangular shape (about 20x30 cm ) , greased with margarine , lined with parchment paper and greased again . After baked , repeate again with the rest of the dough;
- We will then have two layers of cake . In a table or countertop , spread one of the halfs with egg cream and sprinkle with almonds as you like ;
- Put the other half of the cake on top of the first with the most cooked part facing the center ;
- Spread the entire cake with the egg jam, smoothing with a spatula to keep it shiny and with smooth appearance ;
- Spread about 100g of diced almonds on a baking tray and bake in a hot oven for a few minutes until they roast a bit . If you prefer , use raw almond ;
- With the hand , spread the  cake edges with the almonds;
- Decorate the cake at taste ( you have made ​​decorations at stores) may use well beaten cream and a pastry bag to write or garnish;


And that's it. Go for it!
Have good adventures, and don't forget to comment and give suggestions ;)

Sunday 28 April 2013

Dessert - Bread Sponge Roll-Pie


Hello little Artists!

Now I bring you a very simple dough that will give many different recipes: Bread Sponge cake (hope I got it right, if not, please, someone correct me). This dough can be used in stuffed pies, simple cakes, birthday cakes and many other things!
This one was the dough for a roll pie, but later I will explain how to make a birthday cake.

Therefore, we will need:


  • 150g of sugar;
  • 6 eggs;
  • 100g flour;
  • lemon zest;
  • a bowl of any cream stuff the pie.

- Start by separating the yolks from the whites;
- Beat the egg yolks with the sugar until you get a pale and fluffy cream;
- Beat the egg whites until the get firm, and add to the yolks, involving well (in this kind of dough, the better you mix before and after adding something new, softer it will get when cooked);
- Add the lemon zest as much as you like (only put one or two scrapes to give a little taste);
- Add the flour, sifting it, involving quite well and adding the flour slowly (haste is the enemy of a good cook)
- Meanwhile grease a rectangular cake pan with butter, line with parchment paper and grease it again with vegetable margarine;
- Pour the mixture into the pan and bake it at 250 º C. Do not preheat the oven! A good way to bake the sponge cake we are doing is to do it evenly as the oven heats. So bake slowly.  8 or 9 in minutes usually is enough to bake! To be sure, stick a toothpick in different areas of the cake. If out clean, it's ready, if raw but the top is tawny, cover with aluminum foil.
- After cooked, remove it from the oven, spread a cloth on a table and sprinkle with granulated sugar. Turn up the pan of the cloth, remove it and then the paper.
- With the help of a spatula, cover the cake with fruit jelly as you choose from; '
- With the help of the cloth, go rolling the pie without fear of squeezing, pulling the cloth to go shaping the pie.
- Cut the ends of the pie and that's it, we have our pie!

Good Adventures!


Dessert - Orange Mini Cheesecakes


Hello Artists!

I'll bring now a really tasty candy, with few ingredients, it makes an astronomical amount of dessert (with this recipe could make 26 mini cheesecakes)! The only drawback is the amount of time you can spent on bake them in a water bath. But lets go to the recipe!
You'll need:

  • 500g of sugar;
  • 180g flour;
  • 80g butter;
  • 800 ml of milk;
  • 6 eggs;
  • zest of 2 oranges;
  • 1 cinnamon stick;

- We start by boiling the milk with the orange zest and cinnamon stick;
- In a bowl mix the drys (flour and sugar) and eliminate the lumps that may exist;
- Add the eggs and mix thoroughly. Then add the melted butter (the microwave is a good choice to melt it) and the milk (without the cinnamon stick and the orange zest);
- Grease small cheesecake forms with vegetable margarine and sprinkle with flour;
- Fill the cups with the moisture and bake in a water bath (I put in my oven at 250 º C for 30min) and go watching until they golden. When you think they are cooked, poke with a toothpick, if comes out clean, the cooking is complete;
- Remove the forms from the water bath and let cool slightly until the cheesecakes cast down (but unmold warm is easier);
- Remove them from the cups with the aid of a knife to separate the edges and place the cheesecake in paper cups.

Simple recipe, but it takes a lot of work to grease the forms and so many bake cheesecakes, but in the end, believe me it pays off!

Good Adventures!


Dessert - Cream Pudding


Hello little Artists!

Now I bring you a small sin not to eat often (cholesterol is in charge). But, as they say, "Forgive the bad that makes the good it taste."
This Pudding is a very easy to make and it's a different dessert and quite tasty.
We just need:


  • 1 L of cream;
  • 250 g of sugar;
  • 6 leaf gelatin (I always put one or two red ones to give some color);
  • 1 dl of water;

- Start by breaking the leaves (just in half) and put them in a small saucepan along with 1 dl of water. Let stand;
- Meanwhile mix 1 L of cream until mixture is consistent;
- Add 250g sugar gradually, continuing to stir the cream;
- Keep the cream in the fridge for a while (helps keep the cream soft);
- Take the gelatin and water on the stove to dissolve them;
- Pour the liquid in the cream (remember that you always pour the most liquid cream on the most thicker) and stir well;
- Pour the mixture into a form for pudding and refrigerate for 6 hours;
- Remove the Pudding from the pan and garnish as you wish (you can use a syrup or fruit puree on top, is very good)

Good adventures!


Dessert - Berliners


Hello Artists!
Berliners is a cake that I always liked and had the curiosity of make them myself. Thus, as in almost all sweets and dishes that do, I researched several recipes and made one of my own, based on what I found.
I made some mistakes, but that's what trying is all about: it was bad, try to be better next time.
Here is what you'll need:


  • 500g flour
  • 30g Baker's Yeast
  • 150g of sugar
  • 200ml milk
  • 120g butter
  • Zest of Lemon / Orange
  • 3 eggs
  • Salt qs

- Start by dissolving the salt and yeast in warm milk (no need to boil it is better to discard the yeast with the hand so you have to hold the temperature of milk);
- In a bowl mix the flour with the sugar and lemon's zest (or orange one);
- Make a hole in flour and add the milk slowly, stirring constantly with the hand;
- Add the eggs, stirring constantly;
- Once thoroughly mixed the dough, add the melted butter;
- Knead everything well enough to give mass to shape (if it is too watery, go adding flour gradually until you can shape the dough, without it getting too rigid);
- Once kneaded, let the dough rest in the bowl, covering with a cloth and a blanket for half an hour, to grow;

While waiting for the dough, make one portion of "Egg's Jam" (I'm really sorry, I don't know how to call this) to fill the Berliners.

- After growing, stretch the dough on a table or countertop dusted with flour with the aid of a roller, leaving it with about 0.5 to 1 cm thick;
- With the aid of a glass or large cup (the size of the cut will be the size of the Berliners); cut the dough, kneading and stretching the remain over and over again, repeating the procedure until you've used all the dough;
- Let the slices rest a little in order to grow a bit more;
- Fry the slices in hot oil (not too much to be able to fry evenly balls) until they reach the color you want (at this stage the slices should swell forming the balls.) Turn the balls systematically in order to fry both sides;
- Remove from oil and drain on kitchen paper;
- Once cool, sprinkle with sugar (and cinnamon if you like) and with the help of a scissor, open the Berliners and fill with the egg jam.

Hope you like them as much as I did.
Give me your feedback when you try it!

Good Adventures!


Creams - "Egg jam"


Hello little Artists
First of all, I'm really sorry if I make any mistake with English. It isn't my first language and there are some words that I don't know how to translate. Most of them will be in quotes.

So, this is a kind of filling for cakes, as well as a topping. We use it a lot in Portugal.
The recipe is really easy and it don't take a lot of eggs, like some of the recipes I've found (one thing you must learn of me is that I never fully copy a recipe. I search for dozens and then, make one of my own).

For this one we'll need:

  • 4 yolks;
  • 4 eggs;
  • 250g of sugar;
  • water qs
- Start with putting the sugar in a small saucepan and cover it with water, leading to the fire;
- Separate the yolks from the whites (you can use these in candy that need only whites) and put them in a medium saucepan;
- Mix the yolks with the eggs, but gently;
- Let the syrup boil for one minute, stirring occasionally to prevent burning, then removing from the heat and let it cool for a few moments, but not completly;
- Add the syrup to the eggs (must be in this order), slowly, stirring well so the eggs don't start to cook;
- Bring to boil, to thicken, stirring always so it wont burn;
- If you don't get a soft cream, mash it with an immersion blender.


And with this, you have a delicious cream that you can use in cakes, cookies or any other dessert you like.

Good Adventures and don't forget to comment!

The Beginning


Hello little Artists!
I've started this Blog so I could share one of the things that make me really happy (at least when it works) and that is cooking!
A lot of people think that cooking is really complicated or that they will never be able to impress anyone with their cooking. Well, I believe that anyone can learn to cook and be an excelent cook, able to amaze one or two people, now and then. I can't promise that I'll publish recipes everyday, but I'll do my best to bring new recipes, good ones and most of all, easy ones! Then you'll impress your friends and family, and I'll keep secret when they ask "How did you do this? It's so good!".
More than recipes, I'll try to provide some tips to make it easier and fun!

Stand by and dig in your pans for some fun!

Good Cooking Adventures!